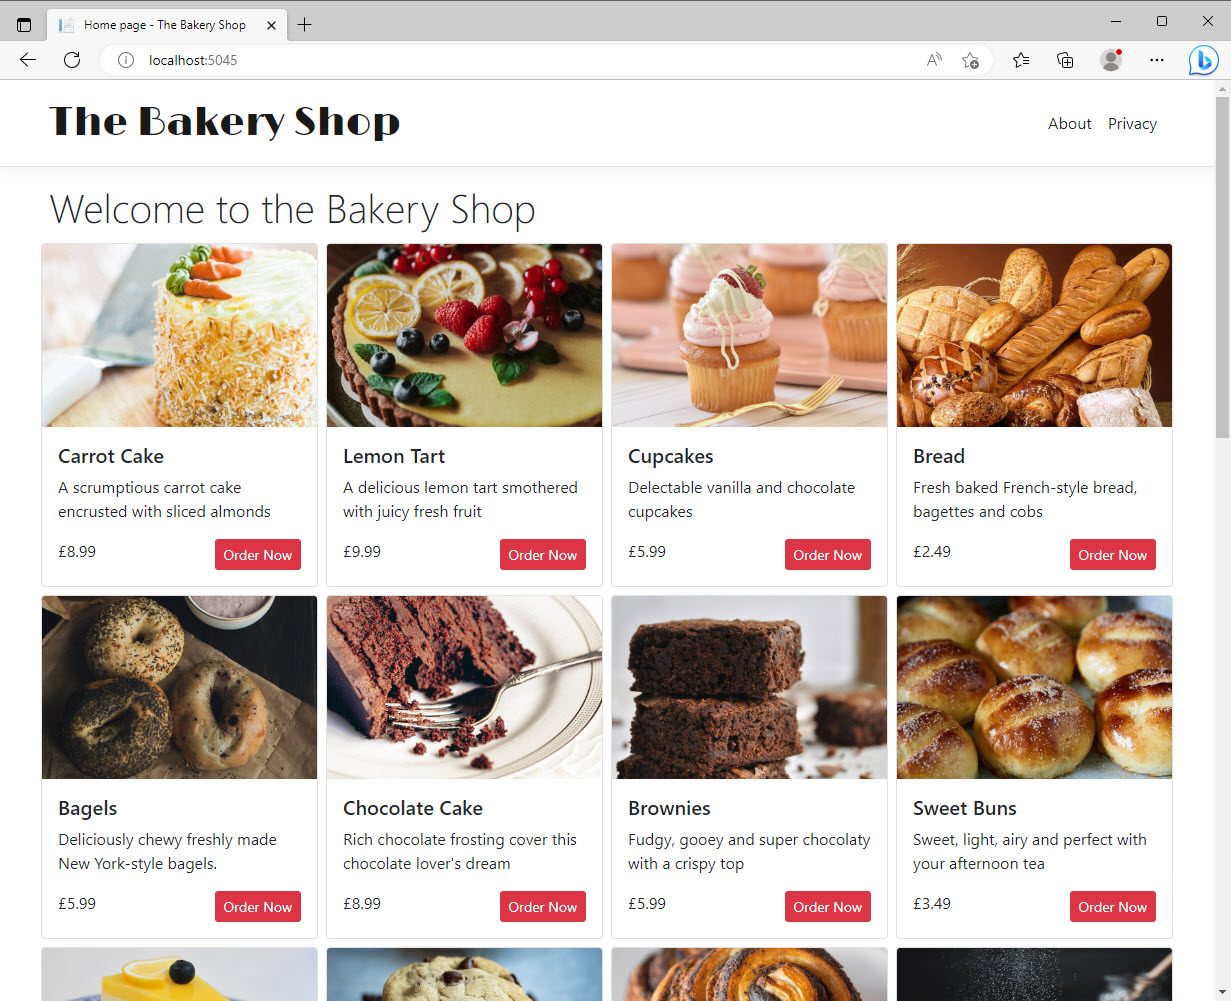
In this first look at working with data in a Razor Pages application, you will focus on using the BakeryContext to retrieve data for display on the home page and the ordering page, which has yet to be added to the application. You are working towards producing a home page that looks like this, where all of the products are displayed together with their description, image and price:

The PageModel
First, you will inject the BakeryContext into the IndexModel class and use it to populate a collection of Product entities. Open the Pages/Index.cshtml.cs file and replace the existing contents with the following:
using Bakery.Data;
using Bakery.Models;
using Microsoft.AspNetCore.Mvc.RazorPages;
using Microsoft.EntityFrameworkCore;

namespace Bakery.Pages;

public class IndexModel : PageModel
{
    private readonly BakeryContext context;
    public IndexModel(BakeryContext context) =>
        this.context = context;

    public List<Product> Products { get; set; } = new ();
    public async Task OnGetAsync() =>
        Products = await context.Products.ToListAsync();
}
This is the PageModel file. Recall that the PageModel acts as a combined page controller and view model, the latter representing the data required for a view. Most often, the view is a page, but it could be a partial or a view component, which you will meet in a later sections of this tutorial series.
As a controller, the role of the PageModel is to process information from a request, and then prepare the model for the view (the view model). There is a one-to-one mapping between PageModels and Content Pages (the view) so the PageModel itself is the view model.
Information from the request is processed within handler methods. This PageModel has one handler method - OnGetAsync, which is executed by convention whenever an HTTP GET request is made to the page. The PageModel has a private field named context which is a BakeryContext type. It also has a constructor method that takes a BakeryContext object as a parameter. The parameter's value is provided by the dependency injection system. This pattern is known as construction injection.
The PageModel class has a public property Products - a list of products which is populated in the OnGetAsync method.
The Content Page
Now it's time to produce the UI. Replace the code in the Index content page (Pages/Index.cshtml) with the following:
@page
@model IndexModel
@{
    ViewData["Title"] = "Home page";
}

<h1 class="fw-light">Welcome to the Bakery Shop</h1>
<div class="row">
    @foreach (var product in Model.Products)
    {
        <div class="col-3 p-1">
            <div class="card h-100">
                <img src="/images/products/@product.ImageName" class="img-fluid card-img-top" alt="@product.Name" />
                <div class="card-body">
                    <h5 class="card-title">@product.Name</h5>
                    <p class="card-text">@product.Description</p>
                    <div class="d-flex justify-content-between">
                    <span class="card-text">@(product.Price.ToString("c"))</span>
                    <a class="btn btn-danger btn-sm" asp-page="/Order" asp-route-id="@product.Id">Order Now</a>
                    </div>
                </div>
            </div>
        </div>
    }
</div>
The @model directive at the top of the page specifies the type for the page's model (IndexModel). You work with the PageModel through the content page's Model property.
The code loops through all of the products and displays their details including their image. Each product includes a hyperlink, styled like a button (using Bootstrap styling). Although it doesn't go anywhere yet, the hyperlink is generated by an anchor tag helper, which includes an asp-route attribute. This attribute is used for passing data as route values to the target page. The route parameter is named id, and the product's key value is passed to the attribute. You will see how this works in more detail when you add the Order page, which is the next step.
In the meantime, test the application by executing dotnet watch at the terminal which should result in the application launching in a browser. The home page should look like the image at the beginning of this section.
Adding The Order Page
If you inspect the href values of the Order Now buttons, you will see that they are presently empty. This is what happens if the anchor tag helper is unable to find a route for the path passed in to the asp-for attribute. You will resolve this by adding a new page which will initially attemtpt to fetch and display details of the product associated with the id value passed in the URL when the button is clicked.
Execute the following command in the terminal to add a new page called Order:
dotnet new page --name Order --namespace Bakery.Pages --output Pages
Open the newly created Order.cshtml.cs file and replace the content with the following:
using Bakery.Data;
using Bakery.Models;
using Microsoft.AspNetCore.Mvc;
using Microsoft.AspNetCore.Mvc.RazorPages;

namespace Bakery.Pages;

public class OrderModel : PageModel
{
    private BakeryContext context;

    public OrderModel(BakeryContext context) =>
        this.context = context;

    [BindProperty(SupportsGet = true)]
    public int Id { get; set; }

    public Product Product { get; set;}

    public async Task OnGetAsync() =>
        Product = await context.Products.FindAsync(Id);
}
Again, the BakeryContext is injected into the PageModel constructor. A public property, Product, is instantiated in the OnGetAsync method. The FindAsync method takes a value representing the primary key of the entity to be returned. In this case, the parameter passed to the FindAsync method is another public property - Id. But where does it get its value from?
The Id property is decorated with the BindProperty attribute. This attribute ensures that the property is included in the model binding process, which results in values passed as part of an HTTP request being mapped to PageModel properties and handler method parameters. By default, model binding only works for values passed in a POST request. The Order page is reached by clicking a link on the home page, which results in a GET request. You must add SupportsGet = true to opt in to model binding on GET requests.
If you recall, the anchor tag helpers on the home page that link to the Order page include an asp-route-id attribute, representing a route value named id. By default, route values are passed as name/value pairs in the query string of the URL: /order&id=1. Razor Pages also supports passing route values as segments of the URL: /order/1. This is accomplished by defining a route parameter as part of a route template within the content page. That is what you will do as part of the next step. Amend the content of Order.cshtml as follows:
@page "{id:int}"
@model Bakery.Pages.OrderModel
@{
  ViewData["Title"] = "Place your order";
}
<div class="progress mb-3" style="height:2.5rem;">
  <div class="progress-bar w-50" style="font-size:1.5rem;" role="progressbar">Select Item</div>
</div>
<div class="row">
  <div class=" col-3">
    <h3>@Model.Product.Name</h3>
    <img class="img-fluid" src="/images/products/@Model.Product.ImageName" title="@Model.Product.Name" />
    <p>@Model.Product.Description</p>
  </div>
</div>
The first line of code contains the @page directive, which is what makes this a Razor Page, and it also includes the following: "". This is a route template. This is where you define route parameters for the page. This template defines a parameter named id which will result in the anchor tag helpers on the home page generating URLs with the id value as a segment rather than as a query string value. You have also added a constraint. In this case, you have specified that the value of id must be an integer (:int). The order page cannot be reached unless a integral value for the id route value is provided. If the vaue is missing, or is not an integer, Razor Pages will return a 404 Not Found response.
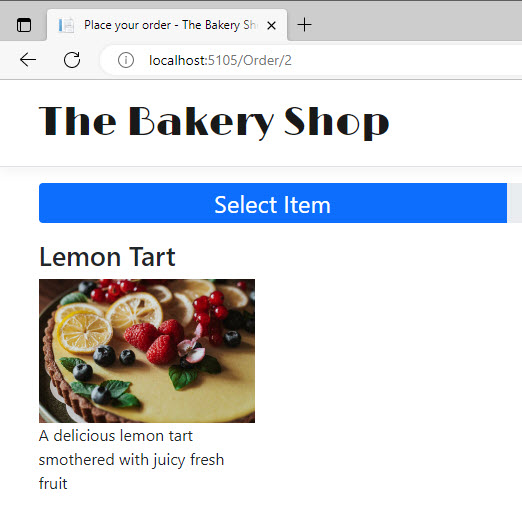
Now if you run the application and click on one of the buttons on the home page, the order page is displayed with the name of the selected product:

Summary
You have successfully used the BakeryContext to connect to the database and retrieve data which has been assigned to properties of the PageModel. They are exposed via the Model property in the content page. You used Razor syntax to loop through a collection of products to display them. You have also seen in this section how to pass data in URLs and leverage the BindProperty attribute to map route values to public properties in the PageModel. Finally, you have seen how to use that value to query for a specific item so that you can display details of it.
Soon you will start working with forms to collect user details for an order. The form will rely on some CSS and JavaScript. Before you build the form, you will add support for Sass - a technology that makes working with CSS easier.
Next: Adding Sass Support
Previous: Creating a Migration
